
Installing WordPress is very easy and any one can do it. There is never any reason to pay anyone to install WordPress for you. It is easy and takes less then 5 minutes even if you never installed a script before. In this guide I am going to assume that you already got hosting where you want to install WordPress.
How to install WordPress using Softaculous
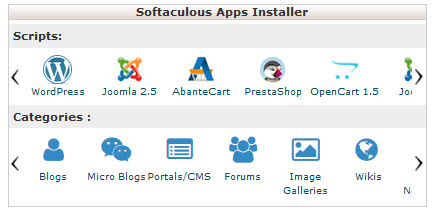
Softaculous is a software that can help you install hundreds of different software on your web hosting. Most Unix based hosting comes with Softaculous but it is up to the host to decide if they want to offer it or not. Login in to Cpanel and scroll down to the bottom page to find Softaculous. If you do not find it there then that likely means that your host does not offer Softaculous. Sometimes you will not see any Softaculous but instead a WordPress button. If there is a WordPress button in Cpanel then you should click that. If not you should click Softaculous and then WordPress on the new page. This will load the page were you install WordPress using Softaculous.
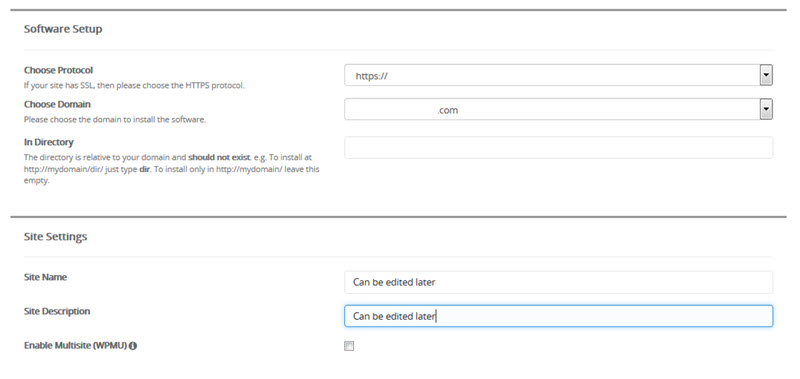
On the installation page you should start by choosing a protocol. If you do not know what to choose then I recommend you chose http://www.
You normally do not need to change anything under domain.
If you want to install the blog directly as the main page of your domain then you should make sure that the “In Directory” field is empty. This usually means removing “wp” from the field. If you want to install WordPress in a sub directory then you should enter the sub directory in the field instead.
You can ignore the site settings. You can change the blog name and title later with ease.
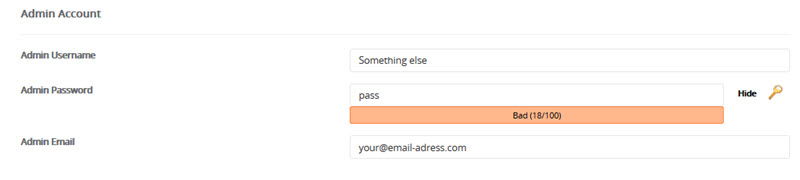
You then come to the “Admin Account” settings. I recommend that you do not use admin as the login but rather change it to something else. This will radically increase security and make it harder for a person to hack your password and gain access to your site. The reason for this is that most brute force attacks assume that your user name is admin and will therefore fail if you use another username for the admin account. Make sure that you chose a strong password and that you enter the correct email address.
Once this is done you can ignore the rest of the settings and scroll down to the install button. Click it to install WordPress. It only takes a few seconds.
You can now visit your domain to login into your new WordPress installation and start editing it.
How to install WordPress manually
Installing WordPress manually is also very easy but usually takes a little longer than it takes to do it through Softaculous.
The first thing you must do is to upload the WordPress files to your server. Make sure that you upload them to the folder where you want to install WordPress. This usually means the main folder but you can also chose to install it in a sub folder.
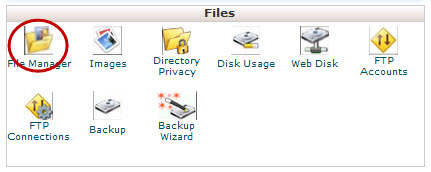
There are two ways to upload the files. Through an FTP client or through the file manager in Cpanel. In this guide we are going to use the file manager since you might not want to install a ftp client simply to create one blog. To use the file manager you need to login to Cpanel and click on the file manager icon. It is often high up on the page although you might have to scroll down a little to see it.
Once the file manager is loaded you should click your way to the folder where you want to install WordPress. If you want to install it in main folder of the domain then you should navigate your way to the public_html folder.
Once there you should click the upload button to be able to upload the files. Choose the entire WordPress zip file and upload it. Once it is uploaded you should mark the file and click extract. All files will be extracted. The files will however be extracted into a sub folder. Open that sub-folder and you should see the WordPress files. Mark all files and folders and click move. Now simply remove the name of the subfolder and the trailing slash from the url in the destination field and click move. This will move the files into the right folder.
You have now uploaded all files WordPress is going to need and it time to create a database.
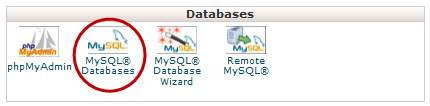
To do this you should go back to the main Cpanel page and click on MYSQL databases. Lets start by creating a database. You do this at the very top of the page. Enter what ever name you want for the database and click create database. You will be taken to a new page where you are told that the database was created. Save the name of the database you just created because we are going to need it soon. The database name should look like this hostingname-thenameyougavethedb.
Click back and scroll down. We should now create a database user. Choose whatever name and password you want to use for the database user. Choose a safe password because you will almost never have to use it. Save the user name and the password. The user name should look similar to the database name in the example above.
Now we have both a database and a database user. Now all we have to do is to connect the two. To do this you need to go back to the main database page again and click add user to database. The settings should already be correct so you can just click. On the next page you should choose to give the user all privileges and save the settings. The database setup is finished.
Go back to the file manager and find the file named config_sample.php and remove the sample from the file name. Once the name change is completed you should right click on the config.php file an choose edit. Editing this file is the last step towards installing WordPress.
You will need to edit the following field database_name, database_user and password. All this fields contain sample info when you open it. This sample info needs to be replaced with information about the database Worspress will use. The database we just created. Just enter the information you saved while creating the db. Make sure you enter the info correctly. Save the document when you have edited the 3 fields mentioned.
You are now ready to enter your domain name in your browser. You will hopefully be taken to a WordPress install page. Follow the instructions on the screen to finish the installation.
Congratulations. Your new WordPress site is ready.